Want to know how to create Canvas Detail Pages and Mobile Pages in Zoho CRM – here is help.
A rainbow look of the basic old structure of the records has been a long-time dream that has been fulfilled by Zoho Canvas. Using this we can customize the record detail pages with no code and a beautiful visual interface. This will have a decent view of the high-resolution styles for the data present in the records. We will discuss all the styles that will come under this Zoho Canvas feature.

What is Canvas in Zoho?
Canvas in Zoho is as MS Paint is for Microsoft Office. It is a drag-and-drop Interface Builder, a custom layout generator, and a data beautifier. Here a feature of it is we can play with the data, styles, elements, and reusable components present as the magical tools of the Zoho Canvas Builder. The supportive feature is Mobile Responsiveness and Enhanced User Interface.
At a high level, Zoho Canvas empowers users to create sophisticated pages – including Detail Views, List Views, and Mobile Views, all without writing a single line of code. Its user interface, extensive customization options, and seamless integration capabilities make it a versatile tool for businesses and individuals looking to build custom user interfaces quickly and efficiently.
Types of Module views available and Zoho Canvas View in CRM
Let’s have a clear understanding of the 3 types of module views present in the Zoho CRM::
Let’s describe each of them,
1). List View:
- Standard List View: It helps modify the data in a specified order as per the user requirement but these list views cannot be deleted.
- Custom List View: Users can do the CRED operations on this list view and even sort it as required per their choice.
2). Kanban View
- Standard List View: It helps modify the data in a specified order as per the user requirement but these list views cannot be deleted.
- Custom List View: Users can do the CRED operations on this list view and even sort it as required per their choice.
- Pre-Defined: In CRM for Tasks, Calls, Meetings, Social, Visits, and SalesInbox; we use the pre-defined Kanban View. This cannot be Customized.
- Customizable: This is like one created by self and this can be applicable where the Pre-defined view is not applied.
- To create a Customizable view, the following fields must be given. They are; Kanban View Name, Categorize By, Aggregate By, and Header Style.
3). Canvas View:
- Custom List View: It is similar to List View but you can customize it with the application of styles like the images, tabs, colors, and buttons.
- Tile View: As the name suggests, it’s like a tile and it can be viewed based on its size and shape. It can even be arranged and categorized custom as required.
- Table View: It is the general and the most viewed view where the records are arranged one after the other in the form of a table and the styles can be added for alternate rows or adjacent rows.
Benefits & Use Cases of Zoho Canvas
It has numerous benefits such as:
- No code Feature: Without using HTML and CSS coding, we can get a wonderful output of the user interface.
- High-end Customization: We can go to a large extent where we can customize the layout as per our requirement and get a combined view of various pieces of data such as tables, images, text, etc. in one large screen.
- Canvas builder: A separate builder is given for the design of the data so that it is unique and has a momentous touch with the user interface.
- Cost-effectiveness: Without hiring any UI/UX designer and spending the money, we can easily use this low code, drag-and-drop feature that is present in the Zoho CRM
Use Cases of Zoho CRM Canvas
Let’s categorize the use cases into two:
- List View use cases
- Detail view use cases
List View Use Cases:
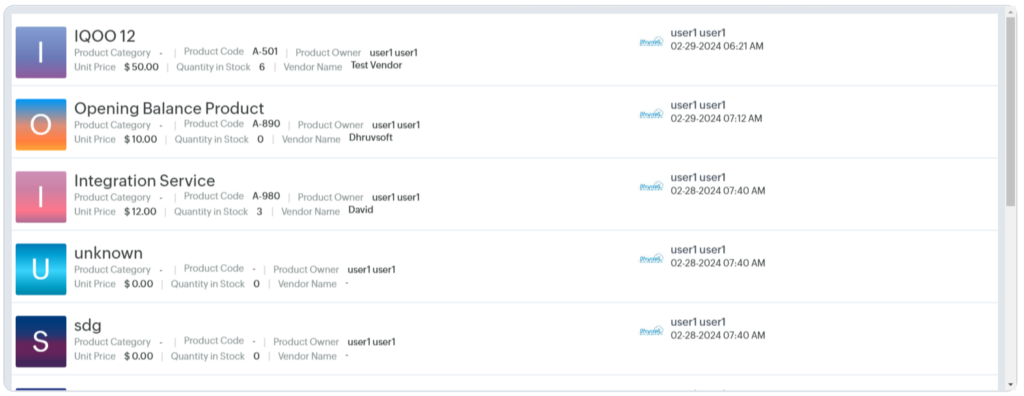
1). Product List: In the Products Module, Suppose we have to view the Products available and see that the useful fields are displayed clearly to showcase it to the end user;
Here, we can use the Custom-List View feature of the Zoho Canvas.
2). Contact List with the Contact Information: In an organization, there are multiple contacts We can add images(here added the organization logo), sections, and text where required as per the user’s choice to get the desired view. We can utilize the Tile – View of Zoho Canvas for the Contacts Module here.

3). Property Listing: Here we can pick up the business of Real Estate where the Properties need to be showcased to the buyer. For that, we use the Tile-View Feature of the Zoho Canvas. So that just by a glance a picture is formed in the mind of the buyer.

Detail-View Use cases:
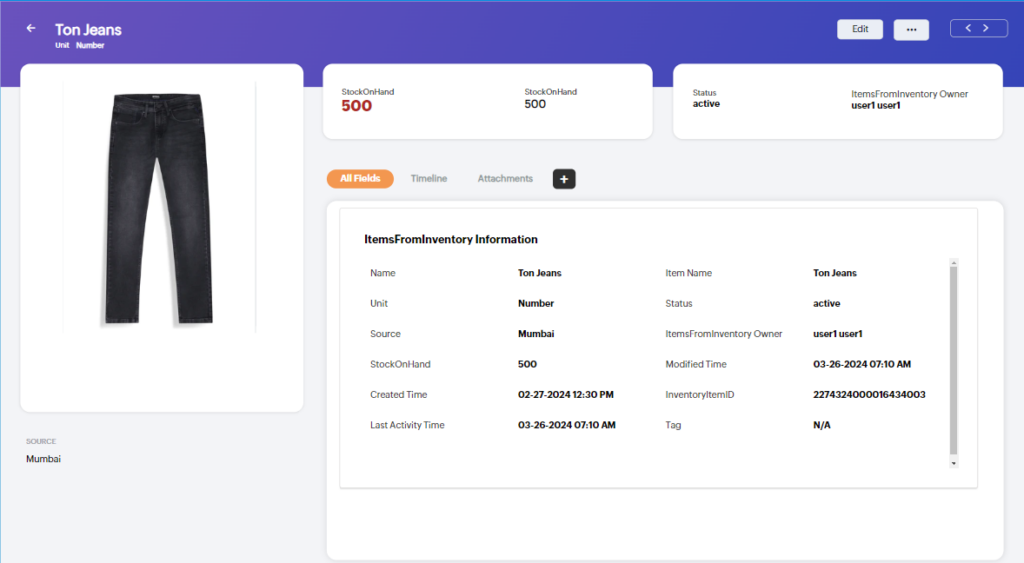
1). Boutique Inventory: Here we try our level best to maintain the correct and accurate data of the Inventory this particular Industry needs so that the managers have a smooth way around to manage the shop. For this, we utilize the Zoho Canvas Detail view where multiple Tiles can be put together to give detailed information about products.
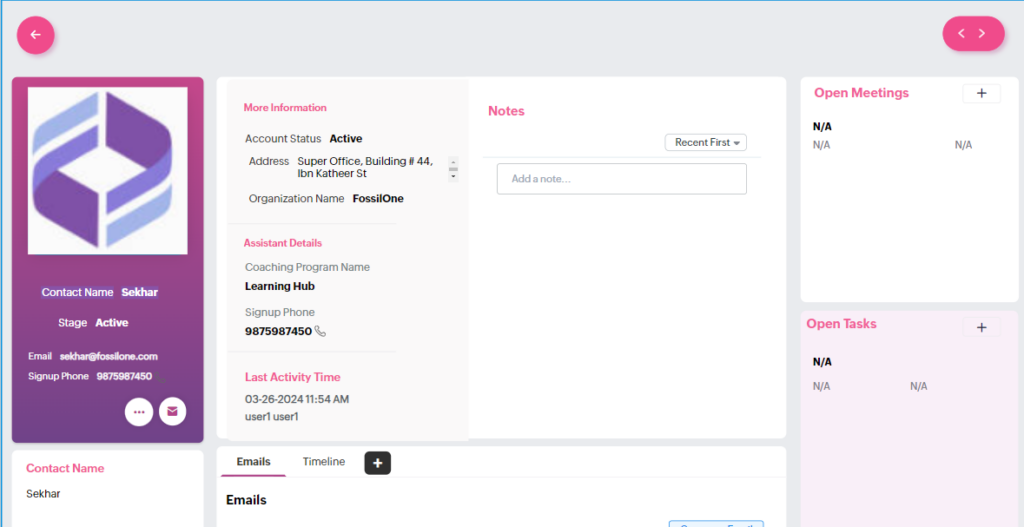
2). Coaching Programs: Here, we display the information of the whole coaching program on one screen and further if any new information needs to be added we can add new tiles with ease. Here is another template from Zoho Canvas used for it.
How to Create a Canvas View for a Detail-Web Page
1). Log in to your Zoho CRM Account
2). Go to Setup
3). Under Customization, select Canvas

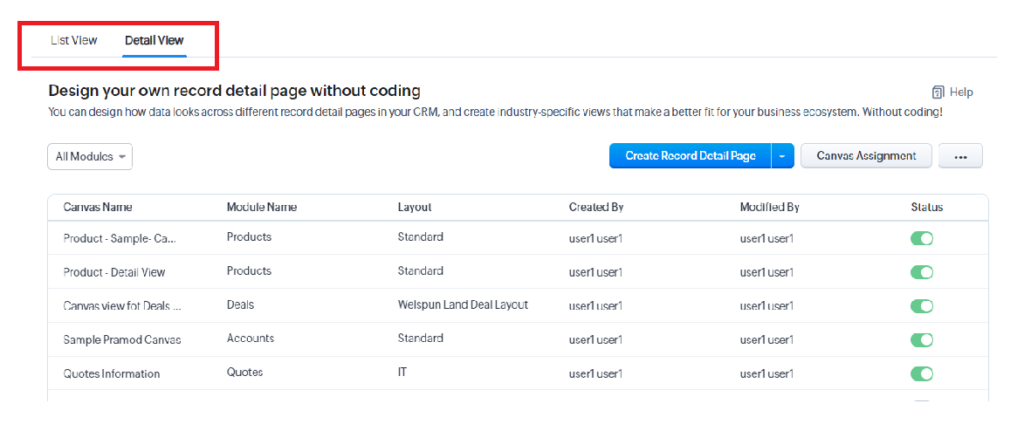
4). Next, Navigate to the Details View Page
5). Click on the Create Record-Detail page option

6). It redirects to the following popup

7) . I have selected the Accounts Module, so the popup is modified as follows:

8). It loads to the following page after selecting the Module and layout options
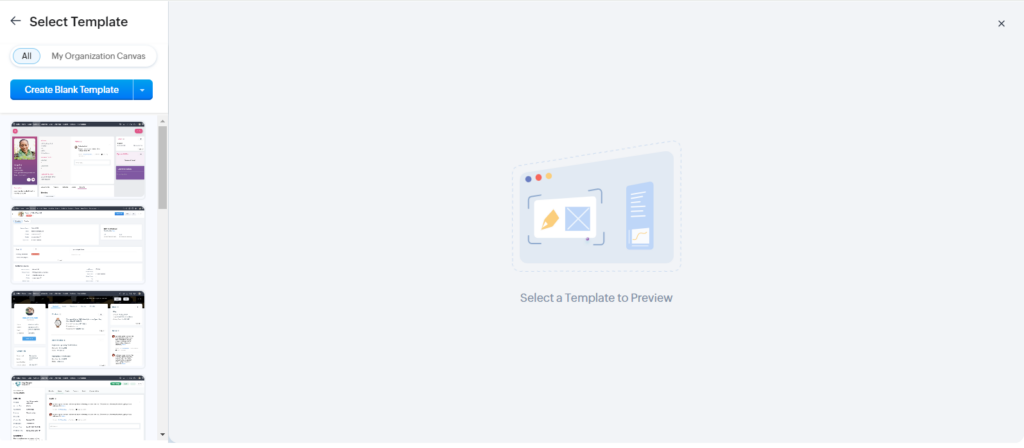
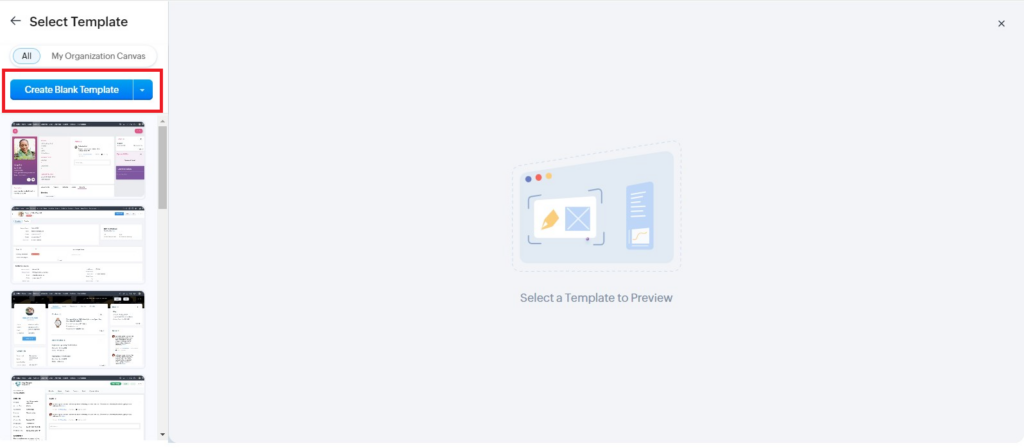
9). I have selected the create blank template option;
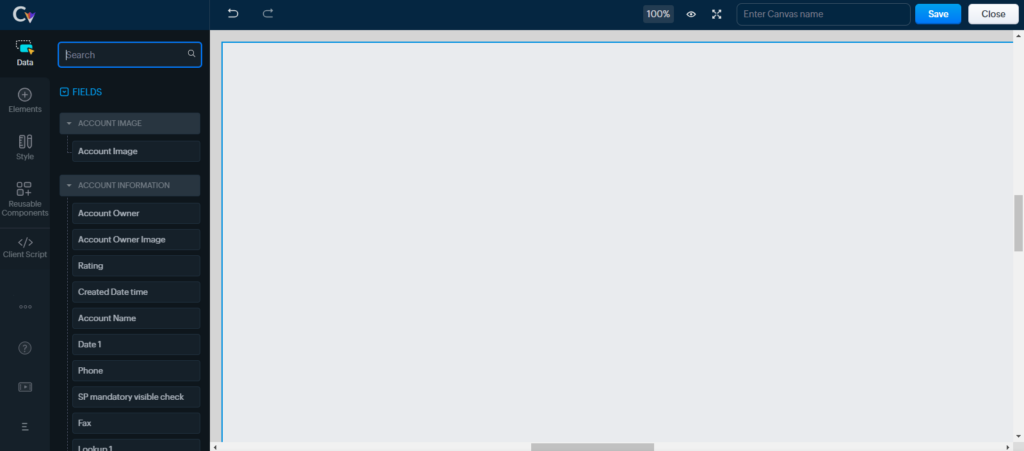
10). If you select a blank template then the below screen popups up
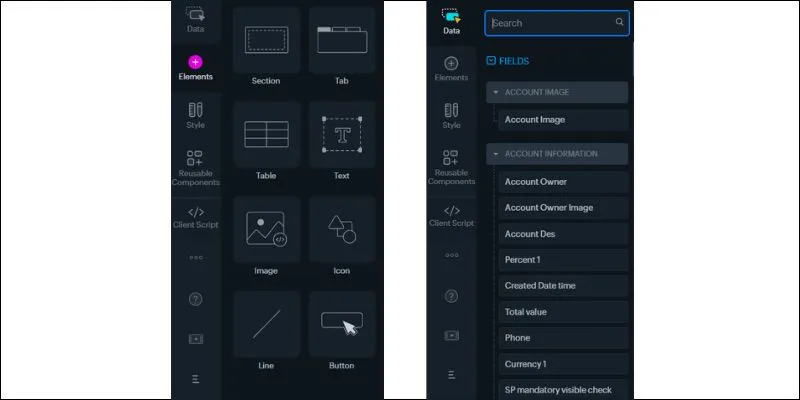
10) (a) The tile that I have selected is from the Reusable Components tab and select the gallery as follows:

10) (b) Next, I customized my created account Information as shown below;

10) (c)The other tiles are from the Elements tab(1) and the fields are from the Data tab(2);
11). If we create from scratch, after the customization the page looks as below, as I did for the Accounts Module.
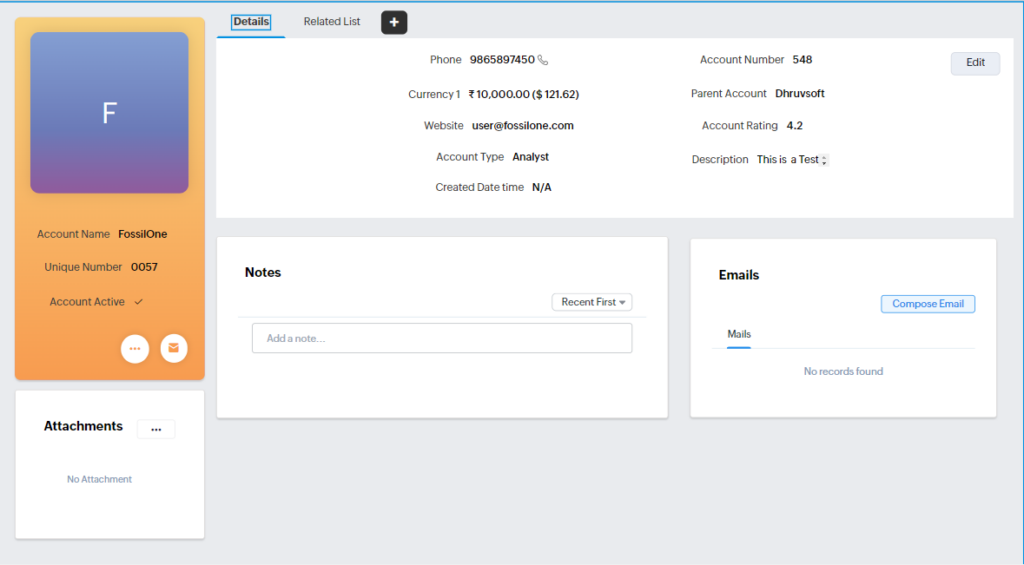
The Related List tab in the above screenshot is as follows;
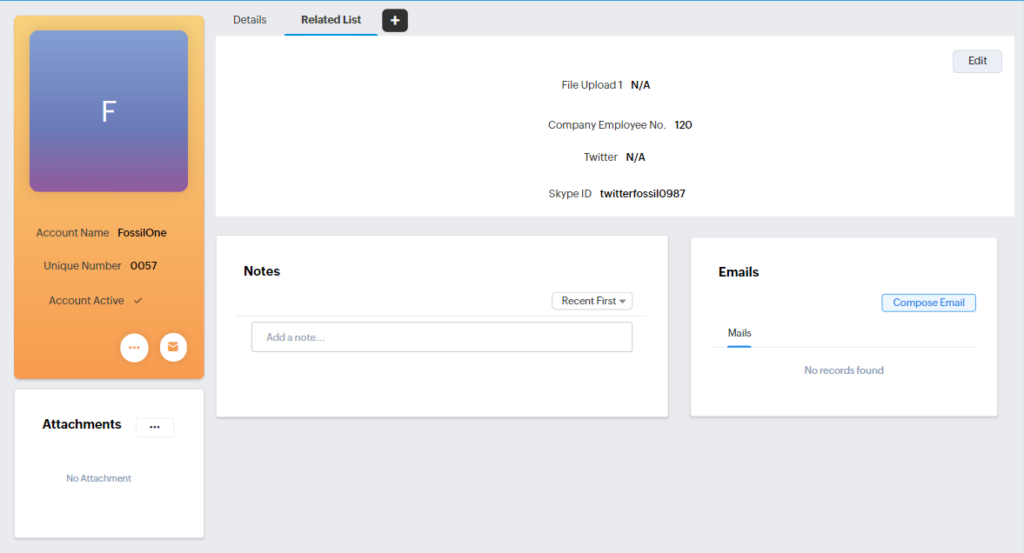
How to Create a Canvas View for a Detail-Mobile Page
Let’s discuss how to create a canvas for the mobile view
1. log in to your Zoho CRM Account
2. Go to Setup
3. Under Customization, select Canvas
4. Next, Navigate to the Details View Page
5. Select the Mobile View
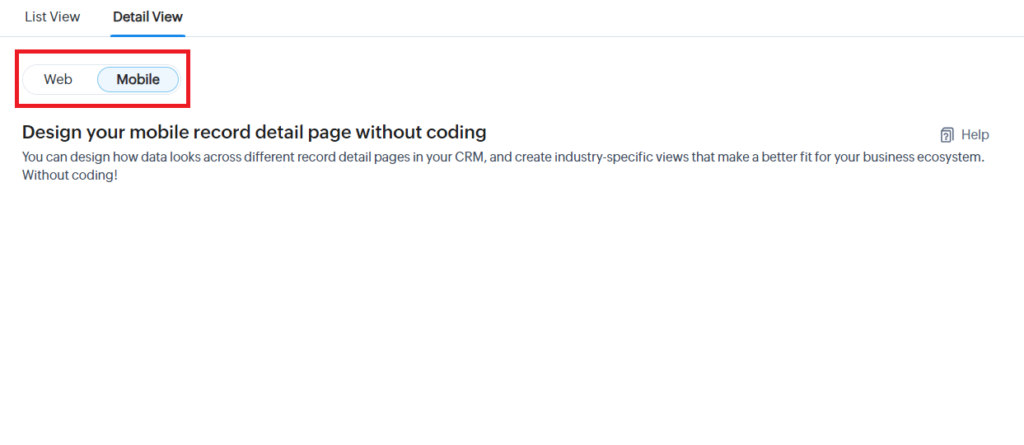
6. Click on the Create Record-Detail page option
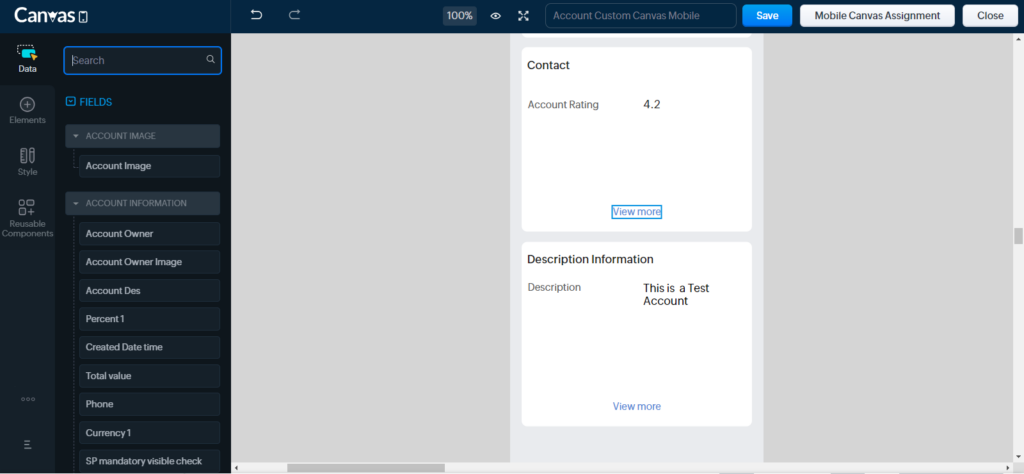
7. The Mobile-Compatible view is displayed from where you can design and view the records page as per your requirement.
8. The mobile view is as follows for the Create Blank template

9. The Mobile view for the final canvas template is as follows:
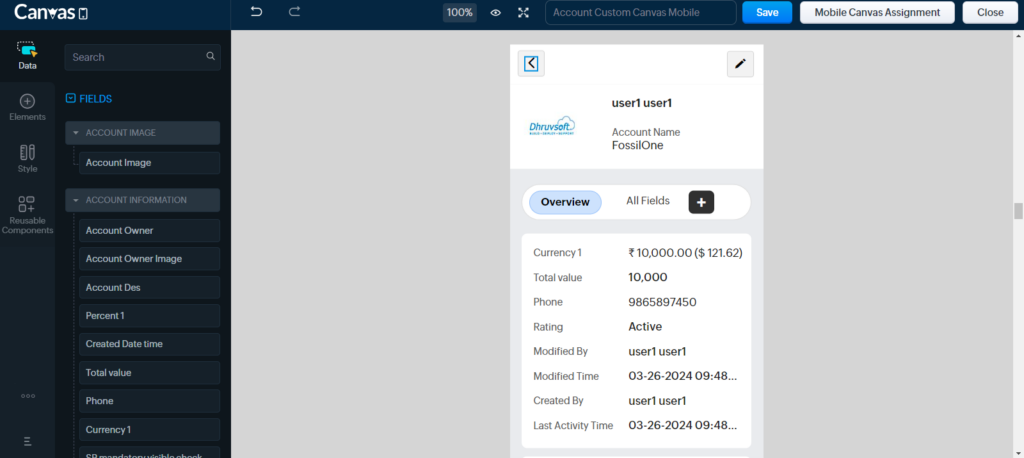
When we scroll down, we get the following view just like a scroll on a mobile
Considerations while Creating Canvas Views
Do’s:
- You must be careful while selecting the Layout
- Be alert, to use the canvas template the status of it must be active. Don’t be in a hurry. Make the status of unnecessary templates inactive which are not being used.
- Be careful while you import/export a canvas template
Don’ts:
- Don’t increase the Complexity of the Data and its usage.
- Always check for responsiveness. Don’t neglect it.
- Don’t ignore the required data and waste time on unnecessary data.
Conclusion
Zoho Canvas is one of the most excellent features of Zoho CRM for the Customization and enhanced User Interface. It helps in better Data Visualization and application of styles in a fine fusion manner. The most remarkable feature of it is that we can get and display multiple data in the required format(tables, text, sections, tabs, etc)of the particular module we have selected.
If your organization is considering the use of Canvas View and needs help from an external consultant – our expert Zoho consultants are here to help.


 “ZOSuccess” is the Zoho Consulting Practice of Dhruvsoft Services Private Limited – a leading Zoho Advanced Partner from India – providing services worldwide …